
Global Knowledge & Community | Local Innovation
Global Knowledge & Community | Local Innovation
Let’s start with a more detailed description:
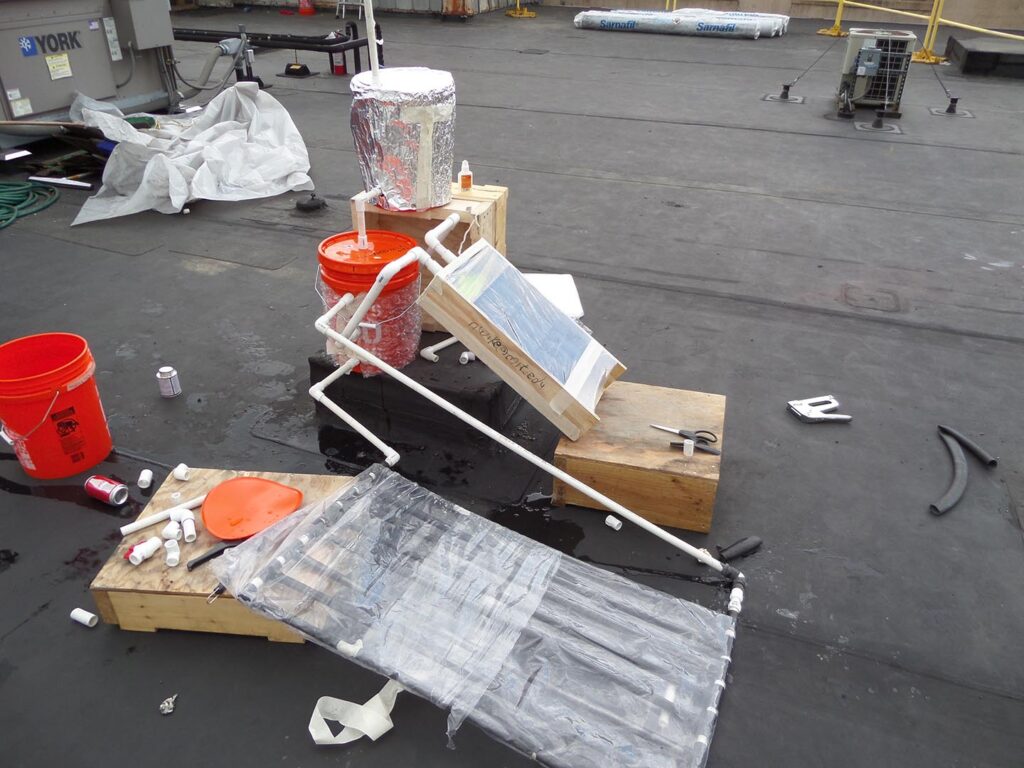
The solar desalination system has three main components: the solar collector assembly, the salt water container and the condenser. Air is heated up in the collector assembly, then bubbled through the salt water where it becomes saturated with water. In the condenser, most of the water vapor in the air stream is condensed out to recover the fresh water.
Collector Assembly: This consists of an an array of coke/pepsi cans with holes at the the top and bottom and joined end to end. The cans absorb solar radiation and become hot, thereby heating up the air inside them. When the air gets hot, it becomes less dense and starts flowing upwards through the collector channel. This type of flow is know as buoyancy induced flow because it results from density difference created by heating up air.
Salt water container: This is simply a container, for example, a bucket, where you pour the salt water. The hot air from the collector assembly flows through the water, absorbing some of it and becomes humid. The humidity increases until it gets saturated. Saturation is the limit of the water carrying capacity of air. And the hotter the air, the more water vapor it can carry, i.e., the higher the saturation limit.
Condenser: This is where you collect the fresh water vapor in the humid air. The idea is to lower the temperature and increase the amount of ‘cool’ solid surface the humid air comes in contact with in order to condense as much water as possible.
Key concepts:
Solar radiation, buoyancy induced flow, air saturation, absorption and reflection of solar radiation, emmissivity.
– – –
Now, let’s start building.
Define the size of your system
The larger the collector assembly, the hotter the air gets, and the higher the freshwater yield. The size will also be limited by the number of coke cans you have at your disposal and the amount of space you have. For now let us build a small assembly that is 5 pepsi cans long and 4 pepsi cans wide!
Of course if you prefer coca cola, you could use coke cans . . . or beer cans . . . or several combinations
Prepare the cans
Wash and dry the pepsi cans
Bore/cut holes at the top and bottom of the cans. One approach is to make two or three smaller staggered holes on each face. A single large hole could also work.
Q. a single large hole or multiple smaller holes, which would work better? Why?
Hint: how does the air heated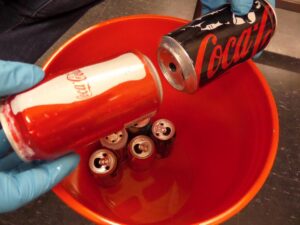
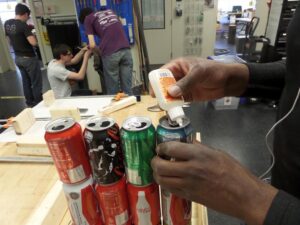
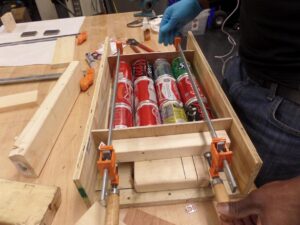
Arrange the cans in 4 rows of five cans each
Glue the cans end to end using an aluminum glue to form pipes
An all-purpose glue can also serve
The cans could also be welded together
Allow some time to dry (you may want to apply some pressure, using clamps or weights, to ensure the glued parts are held firmly together)
Collector casing
Prepare the casing for the collector assembly. In this case, we will build a three-chamber open-top wooden box
Measure and cut out wooden boards for the base, sides and partitions of the outer box.
Sketch out the partitions for the three chambers on the base board. The first partition marks out the inlet chamber, the middle chamber will contain the pepsi-can pipes and the last chamber is the exhaust chamber.
Measure and bore holes in the partition boards. These holes should be placed such that they will align with each row of the pepsi-cans.
Bore a (set of) hole(s) in the side board that will be form the rear end of the box for connecting a (set of) ½ inch pvc pipe(s).
Glue or nail the wooden boards together to create the outer box and the first inlet-side partition
Insert the pepsi-can pipes and glue the the front ends to the inlet partition. Make show the holes in the partition are completely covered by the rims of the cans
Q: Why do you want the holes in the partition board to be completely covered?
Add the exhaust side partition and glue it to the bottom end of the pepsi-can pipes. Make sure that the pipes align completely with the holes and that the pepsi-can pipes cover the holes completely so that there is no leakage
You may use clamps to hold it together under pressure for firmer binding
Spray / paint the cans and the inner box surface black
Q: Why black? Why not white? Or blue? Or even maroon red?
Cover the entire box with a transparent plastic plate or sheet
Q: Why cover the plate with a transparent plastic plate or sheet?
Hint: What is a glazing sheet?
Q: Why a transparent plastic? Why not translucent? Or even opaque?
Salt water tank
Remember that you want to bubble the air through the water, and that air rises through water
Q: Why does air rise through water? Why does it not flow to the bottom?
Hint: What is density? What is buoyancy?
You will bore a (set of) holes in this tank for the hot air inlet on the side of the tank and the second on the top face/cover for the saturated air exit.
The water level should always be higher than the inlet hole
Q: Why should the water level be higher than the inlet hole?
It is best if the outer surface of this tank is black in color
Q: Why do you want a black salt water tank?
Note that the ‘tank’ could be any container that can hold water (a large BP tank, a bucket, bowl, basin, etc., as long as it has a water tight cover.
Condenser
The air coming from the salt water tank is warm and saturated with water. There are two key ideas to keep in mind
The amount of water the air can carry is proportional to its temperature
The larger the cool surface the air comes in contact with, the more condensation can take place
So you want a cool vessel, and you want lots of contact between the gas and the solid surfaces inside. How would you design it? I can give you a few suggestions
Prevent tank from heating up from solar radiation: use plastic material, paint white, wrap with a very reflective material
Q: Why paint white?
Q: Why wrap with reflective material?
Hint: what is reflectivity?
Q: What reflective materials can you find at home, your neighborhood, your school, at the market?
Increase condensation surface area: Make a bed of pebbles and let the gas flow through it, what else?
Natural refrigeration: Can you use a clay vessel, or at least a specially prepared clay vessel?
Have you heard of earthen ware pots, and how your great great grand parents managed to keep water cool in hot (but preferably dry) climate? Can you apply a similar concept here?
Connect
Connect up the three components of the desalination assembly
Note that the collector should be inclined at least at 15 degrees, and the salt water tank should be placed higher than the collector assembly, and the condenser level above that of the salt water tank
Q: Do you know why?
Hint: what happens to air when you heat it up?
Take it outdoors and set it up. Make sure there are no leaks anywhere. Let it operate for a day and see how much fresh water you are able to collect.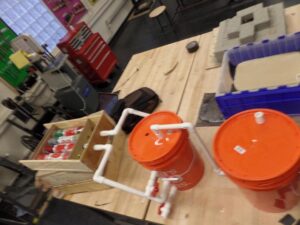
Think to improve
How can you make this device work better?
Hints:
the hotter the air (or the salt water solution), the greater the amount of water the air can absorb
The faster the air flow, the greater the yield of the system
The cooler the condenser, the higher the fresh water recovery
The larger the collector assembly, the hotter the air gets.
How can you make it cheaper?
Hint
Wood is expensive. Can you think of something you can replace the wooden box with, something you could find at home, in your neighborhood?
Other suggestions or ideas to improve it?